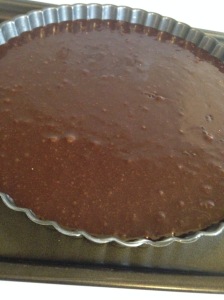
It’s called “The Universal” because you can do anything with it. It’s just that versatile. And easy-peasy-lemon-squeezy. Got a dinner party to go to? A large number to make dessert for? Need something sweet near bedtime on a weekday? This, my friends, is THE cake for you!
This cake is my go-to for gluten-intolerant friends coming over for dinner, or for that friend who would rather have a fudgy brownie than a fluffy cake. Josh, for example, is a big fan of this cake because he’s more of a pie guy. You hand him a 3 layer chocolate cake with ganache in the middle and he says, “I don’t really like cake.” (I’d like to point out that by the time he gets the word “cake” out of his mouth, chances are, I’m finished mine.) Guy never turns down a brownie, though, so this one is perfect.
Versatility is amazing in cakes. If you’re able to take one recipe and turn it into something appropriate for any occasion, you’re golden. For example, if you wanted to make this cake in a giant metal sheet pan, you could do so, then cut it small, and top it with whatever your little heart desires, or make it different for each person. I like it as a simplified Black Forest Cake – my mum always did 3 layers of fluffy chocolate cake, homemade buttercream, cherry pie filling, cherry liqueur, all topped with chocolate shavings and maraschino cherries. That’s my favorite birthday cake. After the recipe, check out my suggestions for toppings!
As you can see, this pile of ingredients is minimal. You don’t have to use a tart pan, if you haven’t got one – I just like the edges. My pan is a 9″ tart, but you can use anything – square, round, larger, smaller; hell, you could make it in ramekins and do individual ones. Just make sure you adjust your cooking time appropriately – I find it best to start with a few minutes less than your recipe says and go up in small increments. Every oven is different, so tread carefully if you’re just getting started!
For those of you who have never used a double boiler, have no fear! All you need is a small pot with a bit of water in the bottom, and a glass bowl to sit on top that doesn’t touch the water.
Once that’s all melted, whisk in your sugar. This will cool your melted chocolate and butter so that you don’t cook your eggs when you add them! Tip: use a different bowl for melting and pour into a cool bowl for mixing. If it’s still too hot, let it sit and cool for a few minutes before moving on.
Finally, sift in your cocoa and whisk. Make sure your pan is WELL buttered. Normally, I would go full Josh and tell you to “chemise that shit”, but in keeping with the gluten-free idea, I skip the flour portion for this recipe. Pour your batter in, set on a baking sheet (just in case – plus, it’s easier to take out of the oven!).
Now, bake that bad boy! Give it a jiggle when you think it’s finished – it should be a little crusty on the top but still have a teensy bit of movement to it. If it’s slightly underbaked, you’ll get a fudgier result.
Pick a topping and go! Chocolate bliss.
Ingredients:
- 4 ounces baking chocolate (dark, semi sweet, chili, whatever)
- 1/2 c. butter
- 3/4 c. granulated sugar
- 3 large eggs
- 1/2 c. cocoa
Melt chocolate and butter in double boiler. Whisk in sugar. Check temperature before adding eggs – nobody likes scramblers in cake! Sift in cocoa and whisk until just blended. Scrape bowl into buttered tart pan, set on another baking sheet and bake in 350º oven for roughly 25 minutes, until there’s a thin crust on the top. Cool on a wire rack for 5 minutes before inverting on your serving plate.
Topping ideas:
- spread with chocolate ganache and roasted almonds
- dust with icing sugar and top with fruit compote
- lightly dust with good cocoa and add your favorite toasted nuts
- black forest – buttercream, cherry pie filling, whipped cream
- substitute chili chocolate for regular baking chocolate (I use Lindt), and then top with mint whipped cream (chop fresh mint and infuse cream for a few hours before whipping) – the result is EXTRA chocolatey flavor with a bit of kick, which is toned down by the cooling effect of mint whip
- plain whipped cream and fresh fruit or berries
- this recipe would even make amazing chocolate bread pudding – we’ll cross that bridge when we come to it. 😉
The possibilities are actually endless. This sunny Sunday resulted in salted caramel and whipped cream.
Yes, I can help you make the salted caramel, too…
- 1 c. granulated sugar
- 6 tablespoons salted butter
- 1/2 c. heavy cream
- 1 tsp. teaspoon sea salt
Heat the sugar in a pot over medium heat. Stir constantly. It hurts, but it’s worth it. The sugar will eventually melt but be careful to keep stirring so it doesn’t burn. Once all the sugar is melted, add butter and stir until melted. Drizzle in the cream SLOWLY – it’ll bubble a lot. Boil for a minute. Remove from heat, stir in salt, and allow to cool before using.
You can save this caramel sauce in the fridge. I used a peanut butter jar. And then ate some with a spoon later. I clearly have no shame.
I know, it looks fancy, but lemme tell ya, it’s easy. I promise. So put your fancy-pants on and get baking!


